2022 Guide to deploy nextJS containers on Fargate with CDK
Ultimate CDK deployment guide for Fargate. It works for any nodeJS Container too.
Few days back I was struggling to publish my nextJS application on Fargate with CDK. It was pretty confusing, since AWS CDK versions have changed and there are no latest blogs on that. AWS has done a pretty awesome job in documenting, but has not done any practical examples that may be useful.
So, here's what I wanted to do.
- I have a nextJS application. I want to containerize it.
- I want to push the container image to ECR.
- I want to use CDK to
- create a VPC,
- create a ecr cluster
- launch a load balanced fargate service, and deploy the container images there.
Now, I do not wan't to do a CI/CD. I want to keep the build and deployment seperate. So, I will be creating the nextJS app, build a docker image and push it to ECR first, and then I'll deploy it.
So, lets begin.
Assumptions
- You already have latest nodeJS LTS version installed. I have nodeJS v16.x installed.
- You already have a working AWS account.
- You'll need to install aws cli in your system, and configure it (Follow docs.aws.amazon.com/cli/latest/userguide/cl..)
- You'll need to install aws cdk (
npm install -g aws-cdk)
- You already have Docker installed in your system.
- VSCode, of course.
Create a nextJS application and containerize it
Lets create a nextJS app
creating a nextJS app
It should be easy. In your console, just type
$ npx create-next-app
and go with the defaults. You'll get the output like
✔ What is your project named? … my-app
Creating a new Next.js app in /home/pluto/GET_RECYCLED/test/my-app.

Using npm.
....

Success! Created my-app at /home/my-app
Inside that directory, you can run several commands:

  npm run dev
    Starts the development server.

  npm run build
    Builds the app for production.

  npm start
    Runs the built app in production mode.

We suggest that you begin by typing:

  cd my-app
  npm run dev
give it a test run.
$ cd my-app
$ npm run dev
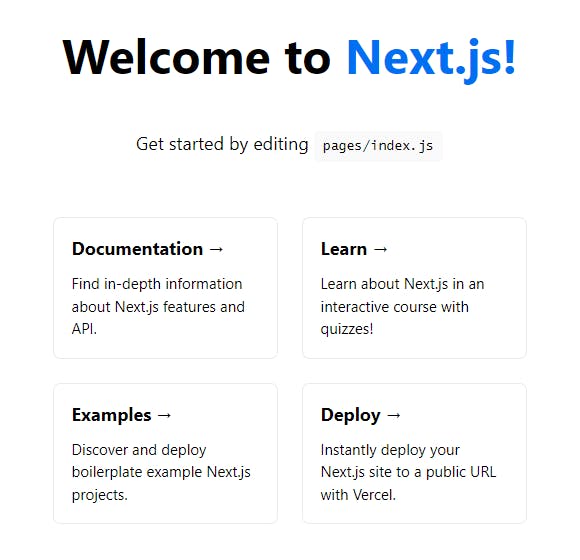
and open your browser with http://localhost:3000
You'll get the following in your browser
Lets containerize this nextJS app
In your console, create Dockerfile
~/my-app$ touch Dockerfile
Open the Dockerfile in vscode and paste the following
FROM node:16.14-alpine3.14
# Setting working directory. All the path will be relative to WORKDIR
WORKDIR /usr/src/app
# Installing dependencies
COPY package*.json ./
RUN npm install
# Copying source files
COPY . .
# Building app
RUN npm run build
EXPOSE 3000
# Running the app
CMD [ "npm", "start" ]
Also, create a .dockerignore file
touch .dockerignore
and in your .dockerignore file, put the following
node_modules
npm-debug.log
NextJS has a official containerization documentation, but the image becomes pretty heavy. We used a simplified Dockerfile here.
Ok, now lets build this image and run it.
$ docker build -t testimage .
After the build is complete, check the image in the local repository
~/my-app$ docker images
REPOSITORY                                                    TAG       IMAGE ID       CREATED          SIZE
testimage                                                     latest    2a8c89ce7dd8   59 seconds ago   375MB
Give it a test run in your system
~/my-app$ docker run -p 8000:3000 -d testimage
and open http://localhost:8000 in your browser. you'll find your app is running.
Ok, so far so good. lets push tag this, and push this to ECR.
Pushing the image to ECR
prerequisites for this step
- Install aws cli
- Configure aws cli. Follow docs.aws.amazon.com/cli/latest/userguide/cl..
Now log in to aws console and go to ECR
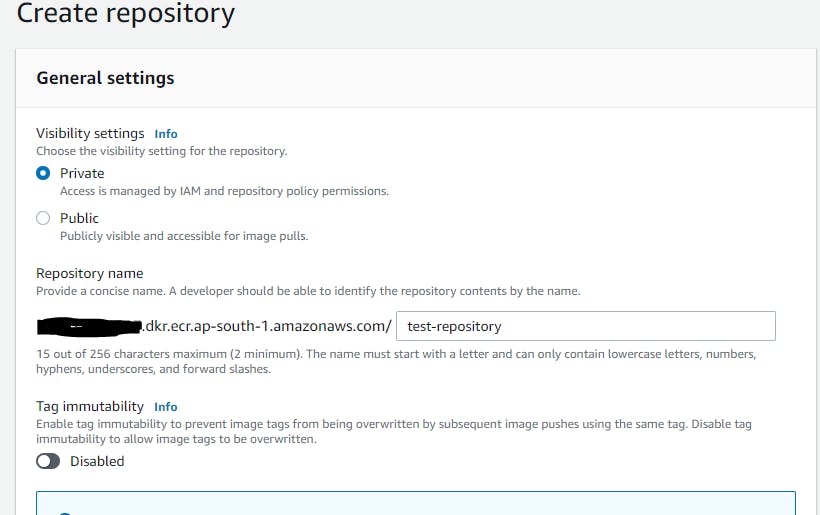
Click on Create Repository

Name the repo as test-repository and click on Create Repository button. Leave everything else as it was.
In the Private Repositories Page, click on the repository name.
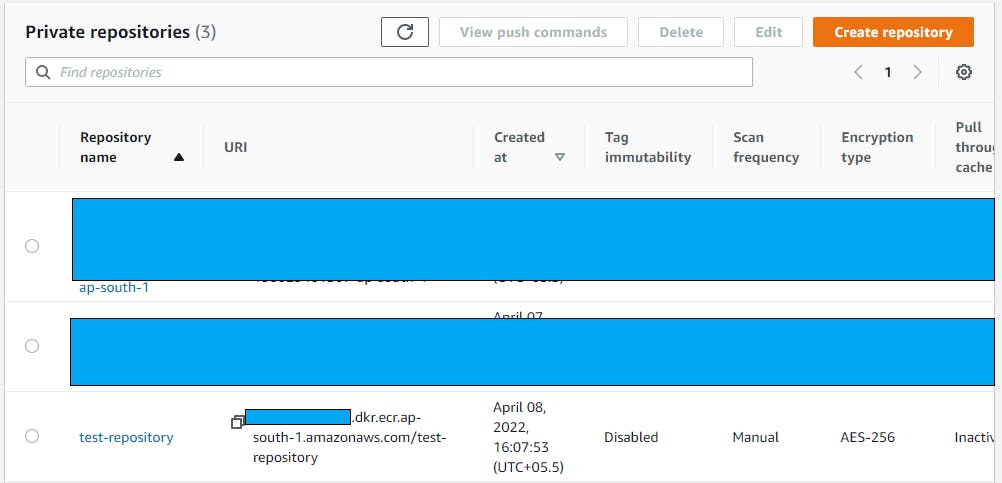
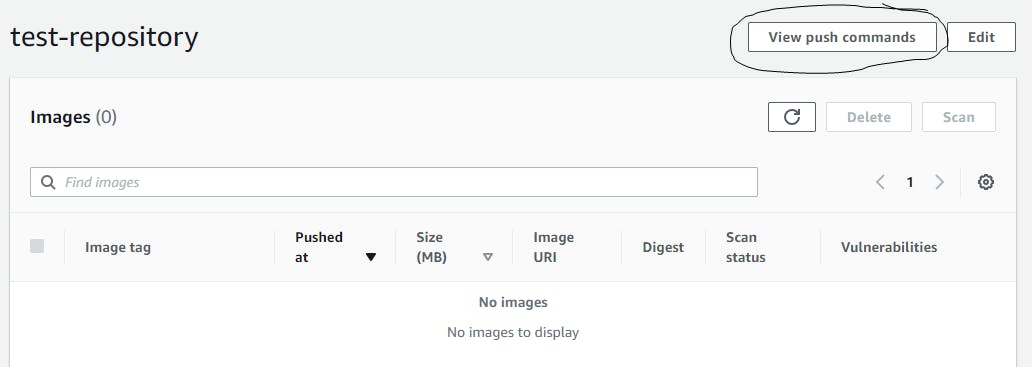
You'll see that there are no images. Click on View push commands
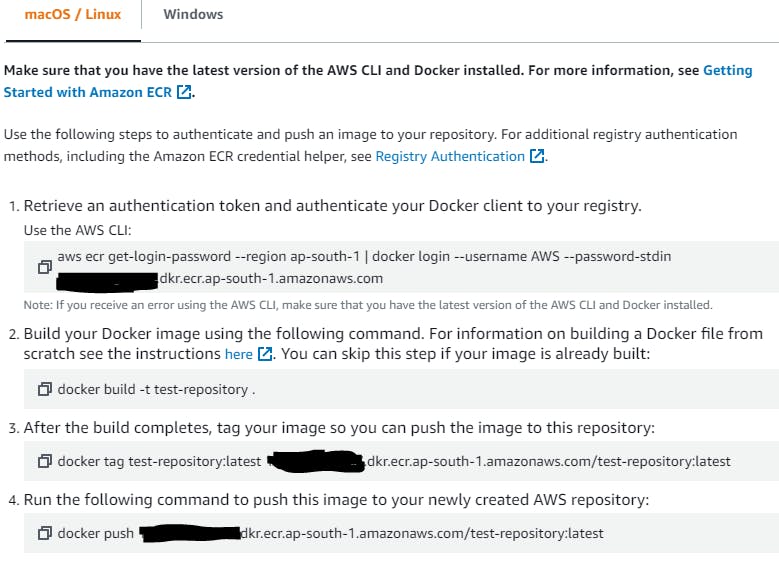
execute these one after another to push the locally built image to ECR.
Now that the image is pushed to the repository, we need the ARN of the repository Creating the ARN of the repo is easy run this on your console
$ aws ecr describe-repositories --repository-names test-repository
{
    "repositories": [
        {
            "repositoryArn": "arn:aws:ecr:ap-south-1:112233445566:repository/test-repository",
            ...
        }
    ]
}
Make a note of this ARN(arn:aws:ecr:ap-south-1:112233445566:repository/test-repository), Youll need this.
Now use CDK to pull this image and deploy in fargate
Install CDK
npm install -g aws-cdk
Do CDK Init and create the CDK application
$ mkdir test-cdk && cd test-cdk
$ cdk init --language typescript
Now, open lib/cdk_part-stack.ts
import { Stack, StackProps } from 'aws-cdk-lib';
import { Construct } from 'constructs';
// import * as sqs from 'aws-cdk-lib/aws-sqs';

export class TestCdkStack extends Stack {
  constructor(scope: Construct, id: string, props?: StackProps) {
    super(scope, id, props);

    // The code that defines your stack goes here

    // example resource
    // const queue = new sqs.Queue(this, 'TestCdkQueue', {
    //   visibilityTimeout: cdk.Duration.seconds(300)
    // });
  }
}
Change it to following
import { Stack, StackProps } from 'aws-cdk-lib';
import { Construct } from 'constructs';
import * as ec2 from "aws-cdk-lib/aws-ec2";
import * as ecs from "aws-cdk-lib/aws-ecs";
import * as ecs_patterns from "aws-cdk-lib/aws-ecs-patterns";
import * as ecr from 'aws-cdk-lib/aws-ecr';


export class TestCdkStack extends Stack {
  constructor(scope: Construct, id: string, props?: StackProps) {
    super(scope, id, props);

    // The code that defines your stack goes here

    const vpc = new ec2.Vpc(this, "MyVpc", {
      maxAzs: 3 // Default is all AZs in region
    });

    const cluster = new ecs.Cluster(this, "MyCluster", {
      vpc: vpc
    });

//use the ARN you noted down earlier

    const repository = ecr.Repository.fromRepositoryArn(this, "MyImage", "arn:aws:ecr:ap-south-1:112233445566:repository/test-repository")

    // Create a load-balanced Fargate service and make it public
    new ecs_patterns.ApplicationLoadBalancedFargateService(this, "MyFargateService", {
      cluster: cluster, // Required
      cpu: 512, // Default is 256
      desiredCount: 2, // Default is 1
      taskImageOptions: { image: ecs.ContainerImage.fromEcrRepository(repository, "latest"), containerPort: 3000 },
      memoryLimitMiB: 2048, // Default is 512
      publicLoadBalancer: true // Default is false
    });
  }
}
Now save this, and run in your console
$ cdk synth
$ cdk bootstrap
$ cdk deploy
It'll take a while here, about 2-3 mins, and if all goes well, you'll get the following output on your console.
 ✅  TestCdkStack

✨  Deployment time: 320.94s

Outputs:
TestCdkStack.MyFargateServiceLoadBalancerDNS123D1234 = TestC-MyFar-AAAABBBBCCCC-123412341234.ap-south-1.elb.amazonaws.com
TestCdkStack.MyFargateServiceServiceURL4CF8398A = http://TestC-MyFar-AAAABBBBCCCC-123412341234.ap-south-1.elb.amazonaws.com
Stack ARN:
arn:aws:cloudformation:ap-south-1:112233445566:stack/TestCdkStack/5abc2fe0-d72f-11ex-82b7-02fda60e87d4

✨  Total time: 332.45s
You can use this http://TestC-MyFar-AAAABBBBCCCC-123412341234.ap-south-1.elb.amazonaws.com on your browser and you'll find your nextJS application running.
Alternatively, you can go to EC2 and go to load balancers in AWS Console
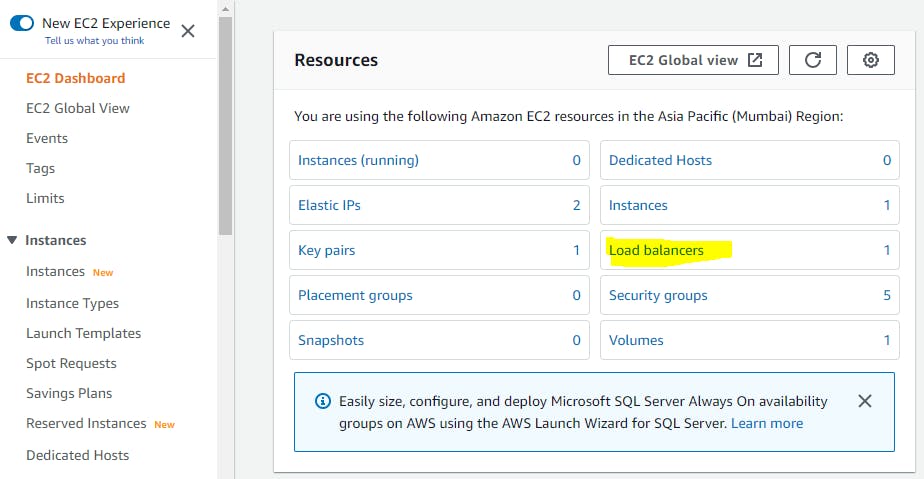
Copy this DNS Name
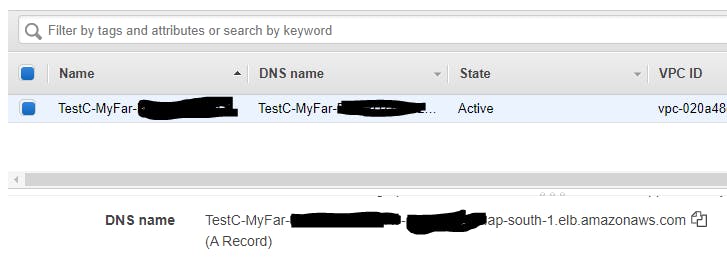
And put it in your browser. You'll see your nextJS application running just fine.
